Conquering the Drip: Identifying and Fixing a Leak Under Your Kitchen Sink
Discovering a leak under your kitchen sink can be a homeowner’s minor nightmare. That persistent drip, drip, drip isn’t just annoying; it can lead to water damage, mold growth, and a higher water bill. But don’t panic! Many leaks under kitchen sinks are relatively simple to diagnose and fix yourself, saving you the expense of calling a plumber. This comprehensive guide will walk you through the common causes of leaks under the kitchen sink, how to identify them, and the steps you can take to resolve them. We’ll also cover when it’s time to call in the professionals. Understanding the anatomy of your sink’s plumbing is the first step to becoming your own leak detective.
Understanding Your Kitchen Sink Plumbing
Before diving into troubleshooting, it’s helpful to understand the basic components of your kitchen sink’s plumbing system. Familiarizing yourself with these parts will make it easier to pinpoint the source of the leak.
- Supply Lines: These flexible tubes connect your shut-off valves to the faucet. They supply hot and cold water to the faucet.
- Shut-Off Valves: Located under the sink, these valves control the water flow to the faucet. They’re crucial for turning off the water before making any repairs.
- Faucet: The fixture that dispenses water. Leaks can occur around the base, spout, or handles.
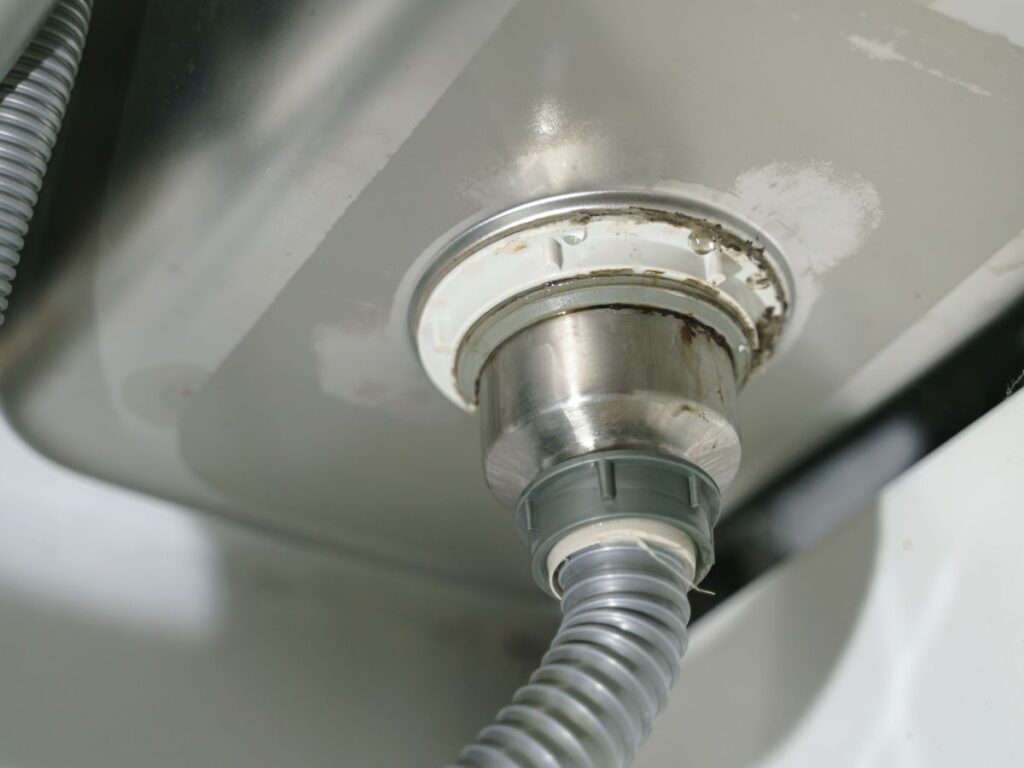
- Drain Pipes: This network of pipes carries wastewater away from the sink. Key components include the strainer, tailpiece, P-trap, and drainpipe.
- P-Trap: The curved section of pipe under the sink that traps debris and prevents sewer gases from entering your home.
- Garbage Disposal (if applicable): A device that grinds food waste for disposal. It connects to the drain system and can be a source of leaks.
Common Causes of Leaks Under the Kitchen Sink
Several factors can contribute to a leak under your kitchen sink. Here are some of the most common culprits:
Loose Connections
Over time, connections between pipes and fittings can loosen due to vibrations or temperature changes. This is especially true for compression fittings. A simple tightening of the connection is often all that’s needed to stop the leak. Always use the correct wrench and avoid overtightening, as this can damage the fitting.
Worn-Out Washers and O-Rings
Washers and O-rings are rubber or plastic seals that prevent water from escaping at connection points. These can degrade over time, becoming brittle and cracked. Replacing worn washers and O-rings is an inexpensive and effective way to fix many leaks. Make sure to match the new washer or O-ring to the correct size for your specific fitting.
Corroded or Damaged Pipes
Corrosion can weaken pipes, leading to pinhole leaks or complete failure. Physical damage, such as dents or cracks, can also cause leaks. If you find corrosion or damage, replacing the affected pipe section is usually the best solution. Consider using PVC pipes for drain lines, as they are less prone to corrosion than metal pipes.
Clogged Drains
A clogged drain can cause water to back up into the sink and put pressure on the drain pipes, potentially leading to leaks at the connections. Regularly cleaning your drain with a drain snake or enzyme-based cleaner can help prevent clogs. Avoid pouring grease down the drain, as it can solidify and contribute to clogs.
Faulty Faucet
Leaks can also originate from the faucet itself. Worn-out cartridges, O-rings, or seals within the faucet can cause drips and leaks around the base, spout, or handles. Repairing or replacing the faucet may be necessary.
Garbage Disposal Issues
If you have a garbage disposal, leaks can occur at the connection points between the disposal and the sink or drain pipes. Check the mounting ring, discharge tube, and other connections for leaks. Sometimes, the disposal itself can develop internal leaks, requiring replacement.
Identifying the Source of the Leak
The key to fixing a leak under your kitchen sink is to pinpoint its exact source. Here’s a step-by-step approach:
- Clear the Area: Remove everything from under the sink to give yourself a clear view.
- Dry the Area: Use towels to thoroughly dry all pipes, connections, and the surrounding area. This will make it easier to see where the water is coming from.
- Observe: Turn on the faucet and watch carefully for any drips or leaks. Check all connections, including the supply lines, faucet base, drain pipes, and garbage disposal (if applicable).
- Feel: Run your hand along the pipes and connections to feel for moisture. Even a small leak can leave a damp spot.
- Use Paper Towels: Wrap paper towels around connections to help absorb water and identify the source of the leak.
- Check While Draining: Fill the sink with water and then let it drain while you observe the drain pipes for leaks.
- Run the Garbage Disposal: If you have a garbage disposal, run it while observing the connections for leaks.
Fixing Common Leaks: A Step-by-Step Guide
Once you’ve identified the source of the leak, you can take steps to fix it. Here are some common solutions:
Tightening Loose Connections
- Turn Off the Water: Locate the shut-off valves under the sink and turn them clockwise to shut off the water supply.
- Use Wrenches: Use two wrenches – one to hold the pipe and the other to tighten the connection.
- Tighten Gently: Avoid overtightening, as this can damage the fitting.
- Turn On the Water: Slowly turn the shut-off valves counterclockwise to restore the water supply.
- Check for Leaks: Observe the connection for any remaining leaks. If the leak persists, try tightening the connection slightly more or consider replacing the washer or O-ring.
Replacing Washers and O-Rings
- Turn Off the Water: Shut off the water supply to the sink.
- Disassemble the Connection: Use wrenches to carefully disassemble the connection where the leak is occurring.
- Remove the Old Washer or O-Ring: Use a small tool, such as a screwdriver or pick, to remove the old washer or O-ring.
- Install the New Washer or O-Ring: Make sure the new washer or O-ring is the correct size and type for the connection.
- Reassemble the Connection: Carefully reassemble the connection, ensuring that the washer or O-ring is properly seated.
- Tighten the Connection: Use wrenches to tighten the connection, but avoid overtightening.
- Turn On the Water: Restore the water supply and check for leaks.
Repairing or Replacing Pipes
Repairing or replacing pipes can be a bit more involved, but it’s often necessary for corroded or damaged pipes. [See also: How to Replace a Corroded Pipe].
- Turn Off the Water: Shut off the water supply to the sink.
- Cut Out the Damaged Section: Use a pipe cutter or hacksaw to cut out the damaged section of pipe.
- Measure and Cut the Replacement Pipe: Measure the length of the section you removed and cut a new piece of pipe to the same length.
- Deburr the Cut Ends: Use a deburring tool to smooth the cut ends of the pipe.
- Connect the Replacement Pipe: Use appropriate fittings, such as couplings and pipe cement (for PVC), to connect the replacement pipe to the existing pipes.
- Allow the Cement to Cure: If using pipe cement, allow it to cure according to the manufacturer’s instructions.
- Turn On the Water: Restore the water supply and check for leaks.
Addressing Faucet Leaks
Faucet leaks can be tricky to fix, as they often involve internal components. [See also: Common Faucet Problems and Solutions]. Consider replacing the entire faucet if the leak is persistent or if the faucet is old and worn.
Dealing with Garbage Disposal Leaks
Garbage disposal leaks can be messy. [See also: Troubleshooting Your Garbage Disposal]. Check the mounting ring for tightness and consider replacing it if it’s damaged. If the leak is coming from inside the disposal unit, it may be time to replace the entire disposal.
When to Call a Plumber
While many leaks under kitchen sinks can be fixed DIY, there are situations where it’s best to call a professional plumber:
- Extensive Water Damage: If the leak has caused significant water damage, a plumber can assess the damage and make necessary repairs.
- Persistent Leaks: If you’ve tried various solutions and the leak persists, a plumber can diagnose the problem and provide a more permanent fix.
- Complicated Plumbing: If you’re not comfortable working with plumbing or if the plumbing system is complex, it’s best to leave it to a professional.
- Lack of Tools or Experience: If you don’t have the necessary tools or experience, attempting to fix the leak yourself could make the problem worse.
Preventing Future Leaks
Prevention is always better than cure. Here are some tips to help prevent future leaks under your kitchen sink:
- Regularly Inspect: Periodically inspect your under-sink plumbing for any signs of leaks or corrosion.
- Tighten Connections: Check and tighten connections as needed.
- Replace Worn Parts: Replace worn washers, O-rings, and other parts before they fail.
- Avoid Harsh Chemicals: Avoid pouring harsh chemicals down the drain, as they can damage pipes.
- Be Mindful of What You Put Down the Drain: Avoid putting grease, food scraps, and other debris down the drain.
By following these tips, you can keep your kitchen sink plumbing in good condition and minimize the risk of future leaks. Addressing a leak under your kitchen sink promptly can save you money and prevent further damage to your home. Remember to prioritize safety by turning off the water supply before starting any repairs and don’t hesitate to call a plumber if you’re unsure about anything.
