How to Fix a Leaky Faucet in the Kitchen: A Comprehensive Guide
A dripping faucet isn’t just annoying; it’s a drain on your water bill and a potential source of water damage. Learning how to fix a leaky faucet in the kitchen is a valuable skill for any homeowner. This comprehensive guide will walk you through the process, step-by-step, ensuring you can tackle this common household problem with confidence.
Why is My Kitchen Faucet Leaking?
Before diving into the repair process, it’s helpful to understand the common causes of a leaky faucet in the kitchen. Identifying the culprit can save you time and ensure you replace the correct parts. Here are some frequent reasons:
- Worn-out Washers: These rubber or silicone rings create a watertight seal. Over time, friction and constant water pressure cause them to deteriorate, leading to drips.
- Damaged O-rings: O-rings are small, circular seals that sit around the faucet stem. Like washers, they can become brittle and cracked, resulting in leaks.
- Loose Packing Nuts: The packing nut holds the faucet stem in place. If it loosens, water can seep out around the handle.
- Corroded Valve Seats: The valve seat connects the faucet to the water supply. Corrosion can create an uneven surface, preventing a tight seal.
- Mineral Buildup: Hard water deposits can accumulate inside the faucet, interfering with its mechanism and causing leaks.
Tools and Materials You’ll Need
Having the right tools and materials on hand will make the how to fix a leaky faucet in the kitchen process much smoother. Gather the following items before you begin:
- Adjustable Wrench: For loosening and tightening nuts and bolts.
- Screwdrivers (Phillips and Flathead): To remove handles and other components.
- Pliers: For gripping and manipulating small parts.
- Penetrating Oil: To loosen stubborn nuts and bolts.
- New Washers and O-rings: Purchase a faucet repair kit that matches your faucet type.
- Valve Seat Wrench (Optional): For removing and replacing valve seats.
- White Vinegar: For soaking and cleaning mineral deposits.
- Clean Rags or Sponges: For wiping up spills and cleaning parts.
- Basin Wrench (Optional): Useful for accessing the faucet connections under the sink.
Step-by-Step Guide: Fixing Your Leaky Faucet
Now, let’s get to the how to fix a leaky faucet in the kitchen process. Follow these steps carefully:
Step 1: Turn Off the Water Supply
The most crucial step is to shut off the water supply to the faucet. Locate the shut-off valves under your kitchen sink. There should be one for hot water and one for cold water. Turn both valves clockwise until they are completely closed. If you don’t have individual shut-off valves, you’ll need to turn off the main water supply to your house. Make sure to inform everyone in the household before doing so.
Step 2: Plug the Sink Drain
Prevent small parts from falling down the drain by plugging it with a stopper or rag. This simple precaution can save you a lot of frustration.
Step 3: Protect the Sink
Cover the sink basin with a towel or old rag to protect it from scratches while you’re working.
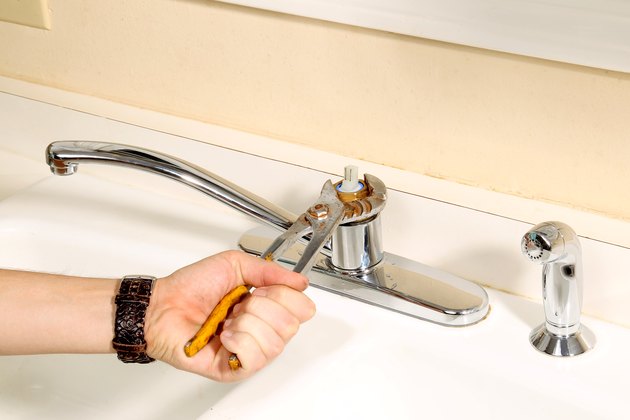
Step 4: Disassemble the Faucet
The disassembly process varies depending on the type of faucet you have (compression, cartridge, ball, or ceramic disc). Here’s a general approach:
- Remove the Handle: Look for a screw on the handle (often hidden under a decorative cap). Use the appropriate screwdriver to remove the screw and pull off the handle. Some handles may simply pull off without a screw.
- Remove the Packing Nut: Use an adjustable wrench to loosen and remove the packing nut.
- Remove the Stem or Cartridge: Once the packing nut is removed, you can usually pull out the faucet stem or cartridge. Note the orientation of the parts as you remove them.
Step 5: Inspect the Parts
Carefully examine all the parts you removed, including the washers, O-rings, stem, and valve seat. Look for signs of wear, damage, or corrosion. Pay close attention to the washers and O-rings, as these are the most common culprits behind a leaky faucet in the kitchen.
Step 6: Replace Worn Parts
Replace any worn or damaged parts with new ones from your faucet repair kit. Make sure the new parts are the correct size and type for your faucet. Lubricate the new washers and O-rings with plumber’s grease before installing them. This will help them seal properly and prevent future wear.
Step 7: Clean the Valve Seat (If Necessary)
If the valve seat is corroded or has mineral buildup, you can try cleaning it with white vinegar and a scrub brush. For stubborn corrosion, you may need to use a valve seat wrench to remove the seat and replace it with a new one.
Step 8: Reassemble the Faucet
Carefully reassemble the faucet in the reverse order of disassembly. Make sure all the parts are properly aligned and tightened. Don’t overtighten the packing nut, as this can damage the stem.
Step 9: Turn on the Water Supply
Slowly turn on the water supply to the faucet. Check for leaks around the handle, spout, and connections under the sink. If you see any leaks, tighten the connections or replace any parts that may be leaking.
Step 10: Test the Faucet
Test the faucet by turning it on and off several times. Check for leaks at different water temperatures. If everything is working properly, congratulations! You’ve successfully fixed your leaky faucet in the kitchen.
Troubleshooting Common Problems
Even with careful attention, you might encounter some challenges during the how to fix a leaky faucet in the kitchen process. Here are some common problems and their solutions:
- Faucet Still Leaks After Repair: Double-check that you replaced all the worn parts and that the connections are properly tightened. Make sure you used the correct size and type of replacement parts.
- Cannot Remove a Stubborn Nut or Bolt: Apply penetrating oil to the nut or bolt and let it sit for a few minutes before trying to loosen it. You can also try using a heat gun to warm the metal and help loosen the connection.
- Cannot Identify the Faucet Type: If you’re unsure of your faucet type, take a picture of it and consult with a plumbing supply store or online resource.
- Damaged Threads on a Nut or Bolt: If the threads are damaged, you may need to replace the entire faucet.
Preventing Future Leaks
Once you’ve fixed your leaky faucet in the kitchen, take steps to prevent future leaks:
- Use a Water Softener: If you have hard water, consider installing a water softener to reduce mineral buildup.
- Regularly Inspect Your Faucets: Check your faucets for leaks and signs of wear at least twice a year.
- Replace Worn Parts Promptly: Don’t wait until a faucet starts leaking to replace worn parts. Replacing them proactively can prevent more serious problems.
- Avoid Over-Tightening: Over-tightening nuts and bolts can damage the faucet and cause leaks.
When to Call a Professional Plumber
While many faucet repairs are straightforward, some situations require the expertise of a professional plumber. Consider calling a plumber if:
- You’re uncomfortable working with plumbing.
- You’ve tried to fix the leak yourself and it’s still leaking.
- You encounter significant corrosion or damage.
- You have difficulty accessing the faucet connections.
- You suspect a more serious plumbing problem.
Fixing a leaky faucet in the kitchen is a manageable DIY project that can save you money and prevent water waste. By following these steps and taking precautions, you can confidently tackle this common household repair. Remember to always prioritize safety and consult a professional if you’re unsure about any part of the process. [See also: How to Replace a Kitchen Faucet] [See also: Common Plumbing Problems and Solutions]
